DIY Stamp Carving 💮 (with an eraser bought from Popular)

Hey friends!
I've been playing around with some arts and crafts things and decided to try out this easy rubber stamp project over the weekend after watching YouTube.
Many videos use a eraser stamp pad/sheet (you can get this from Daiso) and a carving tool, but all you really need is an eraser and a penknife! I decided to have a go after watching this video from ParadeMade, because she used the eraser from the same POPbazic brand (Popular's house brand).
She has soooo many cute and instructional videos too. Stamp layering seems fun!!
I had a small Dust Free Eraser from Popular lying around at home so I used that. This eraser is actually terrible for erasing because it breaks off very easily. I'm extremely glad to repurpose it!

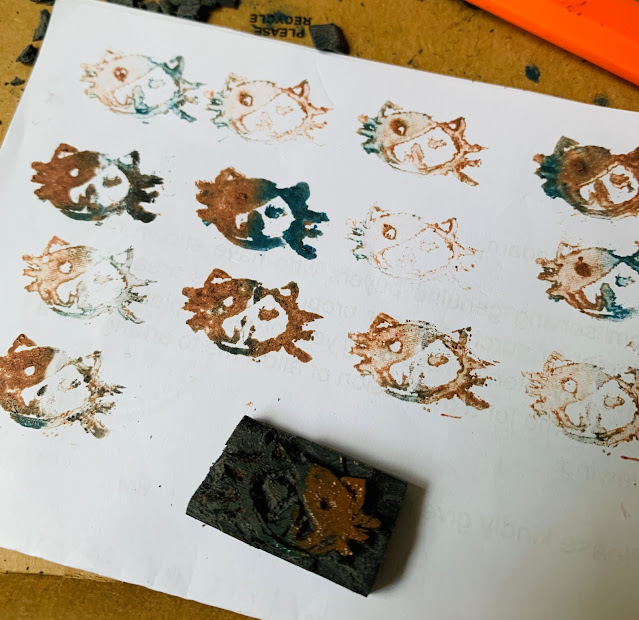
First I tried to make a flower stamp!

I slowly cut and gouged out the outline. This eraser is very soft and breaks off easily. Maybe a harder kind would be better? Hmm.
Here's how my first stamp turned out!

I think the flower kinds of looks like a turtle! XD Maybe curved lines were too ambitious for a first attempt.
As for the stamping, I used an old ink pad from over ten years ago. It's a miracle it has not dried up! It is in terrible shape though. It was a free inkpad that came with a wooden stamp set and everything is flaking off.

•·················How to carve an eraser stamp!·················•
1. First, draw your design on baking paper or tracing paper with a pencil. Since the paper is translucent, you can also easily copy a design that you have on your phone, or one that you have printed.

2. Next, we will be transferring the image onto the eraser. Place the paper on top of the eraser and rub the image on. I used my ruler.


3. It's time to carve! Think about negative spaces and outlines.


Comments
Post a Comment